
Help your fellow builder by leaving your feedback based on these three criteria:
- Originality: How original is this - never seen before?
- Building Techniques: How much skill do you think the creator of this MOC has, in terms of building technique?
- Details: Express how much you like the details of the build.
Your feedback is only shown to the creator as well as yourself. It is not available for other users to see. The creator won't see your user name.
Titan IIIE to go under slight redesign
First off I apologize ahead of time. Second of all, it is knowledge of how the titian IIIE is designed that brings about a slight change. The airforce museum in dayton, oh has a titan IVb on display there and they have pictures of them prepping a cold storaged titan. In those pics, one gets a good look in the stages. Once I saw them I instantly knew what features are on these rockets here and here (large pics not 56k friendly).
https://www.nasa.gov/centers/kennedy/images/content/662977main_voyageronlau...
https://media.defense.gov/2014/Aug/27/2000931806/-1/-1/0/140827-F-DW547-002...
When the second stage fires, there are vents that allow the gases to escape. I knew about them, but not the extent where they existed. The 2 black macaroni pieces need to come out for 2 light blue gray. I thought this was part of the paint scheme. And I am thinking of replacing 8 of the 1x1 round studs to be replaced with black, but I keep looking at the model and think that may not be needed at all. The spacing of those works out well recreating that. I also have to change my Titan IVB slightly now. I will see about getting an updated instructions sometime with these changes and the reinforcement axel.
Apollo Saturn V next to Titan IIIE and small news
Finally got to open my saturn V that I had in hiding from family for xmas. I had a blast building it and note to self. Rocket meeting hardwood kitchen floor not good. Managed to rebuild only missing a 1x2 blue plate. But in any case comparing it to the Titan IIIE just blows my mind. This is truly a work of lego engineering and a testiment to mankinds potential.

I am also shocked I am sitting at 82 supports. Riding the line! Only 18 days and 18 supports left. Thank you people. Can we get there? We will see.
Other updates. There was a delay on a part order so the LP41 tower still is waiting for redesign parts. I also am redesigning the Atlas from my last update. Something that I believe will be structurally supported better but will sacrifice positioning of the oxygen feeds. Here is my thought pattern so far.
Atlas V 551 mock up
Holiday brought some extra time and managed to get a ldd prototype out. I had two ideas for attaching the SRBs but one would have seperated the 3 srbs to far out and I wouldn't have been able to add side pipe details. The pipes on either side could possibly be made to be 1 plate thick, but would have to add more in line bricks and also could compromise structural integrity. Any suggestions welcome. Also there is no 2x2 round white technic bricks. Had to use LBG. The last thing on this is that is it is not to scale that it should. Coming in short at 10 studs! I am still looking to redo, but don't want it to look ridiculous.


Titan IVB SRBI prototype
Still waiting on parts but was able to make up the SRBI of the Titan IVB. Has passed the kid testing phase with alterations done when I built it from ldd. The macarconi pieces actually aren't to bad IRL when compared to ldd. They blend well but the stud holes detract it a little. The titan iiie black rings helped break up that pattern, but this will work fine. Also pictured next to the completed Titan IIIe. It pretty astonding what they accomplished in the improvements of these rockets.
Side note: The slight improvement to the Titan IIIE is actually working and I will need to update the instructions if anyone wants to do it. Just for the record. V1.0 worked just fine. This is more for completeness. However it won't be until after the holidays or perhaps I will hold till the relaunch.

New Horizens and Juno probe mock ups
Here are two probes that were put into space via the Atlas V 551 rocket. These probes were over simplified it seemed and different to design. One was super easy that I am still double taking and wondering what other features i can do while the other I have to cut panels off to stuff it into the centaur shroud shell. The other thing about them is how huge and little they really are respectively. I really want to do Galileo, but until we know if the shuttle is a done deal, I am not going to do it right now.
On a side note, I only need 25 more supports.

Cassini-Huygens Probe
Now that I am waiting on parts for the Titan IVb and some alternate parts for the launch tower, I decided to delve into Cassini. The probe has to be stuffed and shrunk a bit as centaur size limits what I can do. The probe has a dish that is 13.1 ft in diameter and the probe weighs in at 22 ft high. I can do the dish at 4 studs, but 22 ft is 7.62 studs. Ha! No way. I expanded what I had and tried to get a little more detail into it. Fun link below.
https://saturn.jpl.nasa.gov/the-journey/the-spacecraft/
I would like to get the 2 thrusters on the bottom of the probe put on it, but 2 single round studs don't connect at all to the single stud on top of centaur. No ways done tinkering with this one, but feel I won't be able to do much extra other than some element swaps here or there.
I am also going over my probes a little bit more, but nothing major in the way of changes.

Titan IIIE v1.0 instructions
Here we go! The biggest update yet. Instructions for the Titan IIIE v1.0. I doubt many changes will be made, but there are few things I do wish to improve on. Mainly where the center second stage connects to the first stage. Sometimes it will seperate there but it is infrequent. On the SRBs, you may have to play around with the 4x4 round blocks to find where they fit the best where the two axels meet. The 1x2 plates on the shroud are meant to come off when deploying the centaur. It just came out working that way. Any questions? Drop me a comment. Need to put out a Helios v2.0 yet.
EDIT: Had a shipment of parts come in and tried some slight changes to improve structure. Leery of the changes, but they might be working. Will update if good after a week. Will involve 8 macaronni light blue grey bricks, 2 round 2x2 bricks, 5 length axel with stop, and a 10 length axel if works out. Still think this build v1.0 is good as I keep reverting to it every time I try to improve things.
EDIT 2: A note on parts. The only part that will be a problem to get is the red 2x2 round brick with technic holes 17485. It only exists in 1 set as of now and came out this year. It is possible to subsititute all red with orange parts for the CVT, but won't be close to what they are suppose to be. When and if part 4742 (hollow 4x4 cone) comes out, 2 will be needed for the SRBs as there is a superior and very neat design that uses those to make the top of the SRBs. Until then, they will be "flat".
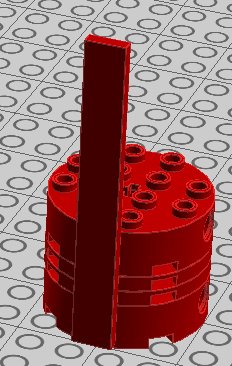
EDIT 3: I remembered a substitute part that is more readily available in red for the 2x2 round brick with holes 17485. Use two 30361. I included a pic rather instructions as it is pretty obvious.


Centaur 1-DT improvements and Centaur G pre-design
Sometimes the limitations of lego just aggrevate me. The Centaur G booster for the Titan IVB has a more bulbous design compared the centaur 1-DT and pushing out to 5 stud from 4 just isn't quite feasible.. I managed to design something, but it is a give and take considering trying to make room for probe magtrameters to go down the side on pat of the centaur G. The other design "improvement" was removing the 1x2 tiles on the bottom of both stages giving them a slightly sleaker look, but suffer seeing studs.

Voyager Probe instructions v2.0
This is version 2.0 of voyager and I regard it as perfect as I can get it. I probably will not be working on refining it any longer. Any information on how voyager worked and deployed should be referenced to my version 1.0 instructions. Changes from old to this one is obvious. The magtrometer is finally in the right position however its true size won't fit and frankly it looks pretty cool the way it is. I managed to center the golden record, make the power supply boom more accurate, and put what I feel is the correct locations for everything major. The only other thing I would like to figure out is a clear display rod or something. Enjoy.


Air Force EMD SW8 train instructions
This has been a conundrum for me. Two different sets of instructions will now exist for the train(s) that pushed the LC41 gantry around. Mine and Eiffleman's. Truthfully we had no idea we both were working on them at about the same time. I was satisfied with my build until I saw his and also came across a pic of the trains while researching Titan IVB. Link to large pic below.
https://www.nasa.gov/sites/default/files/thumbnails/image/titan_ivb_core_ve...
I have made some changes influenced slightly by him and some of my own spin to what I had. Frankly I am not happy with it nor his. Something just doesn't seem to meld right with the train at this scale. I am sure there will be changes in the future, just not a top priority. I would like the fuel tanks to be different and the wheels to be closer.
When doing the fuel tanks in step 1. The 3 length bar goes through parts 4081 to keep them together and provide some structural soundship.


Help your fellow builder by leaving your feedback based on these three criteria:
- Originality: How original is this - never seen before?
- Building Techniques: How much skill do you think the creator of this MOC has, in terms of building technique?
- Details: Express how much you like the details of the build.
Your feedback is only shown to the creator as well as yourself. It is not available for other users to see. The creator won't see your user name.