Modular Portal Testing Chamber
Not Approved
Throw Open the Doors!
After designing the observation room exterior, I had a few ideas for what else to create using this design. I’m prototyping a cube dropper, and yesterday I saw a suggestion from Lego Ideas user darrenoshea to create a door that people could walk through, and immediately got inspired! So here it is! [This door design is outdated by 2 versions, will upload new renders here when rendered]


The new chamberlock door is nearly flush with the panels surrounding it, and opens out to create a similar effect to the game, where each half slides to the side. Plus, now a minifigure can walk through the tunnel! I modified the observation room tunnel, and the rear now has the same guard rail system I’ve started creating. I absolutely love this idea, it’s so much better than the original door!
It can definitely be pushed back one plate to be flush with the surface, if this is something people feel strongly about. I don’t mind how it is now.
This door design replaces the previous door unit, a modular unit, and a guard rail piece; the previous three together took up 69 + 9 + 13 = 91 parts, and the new design (which lets a figure walk to the rear!) is only 78 parts! I punch those numbers into my calculator, it makes a happy face!

Since I’ve rendered these images I have updated the door 2 versions, I’ll render and add those designs soon. I’m really excited about this one! :)
Photos and Sharing!
Short update today! I've added renders to the previous update, go check them out and let me know what to improve!
Also, holy cow! Yesterday we recieved 184 votes in one day, the most support in a single day this project has seen since the 3rd day! Thank you to everyone who shared this project with your friends and asked them for support, you are helping this project Stay Alive!

More updated renders and components to come soon! I'm always happy to hear feedback from my supporters, this should be the perfect set for everyone! :D
Observation & Behind The Scenes
[Now with images!]
After a long time designing, I’m still not really happy with how the Observation Room and Walkways look, but I’d like to hear your feedback!

Observation Room
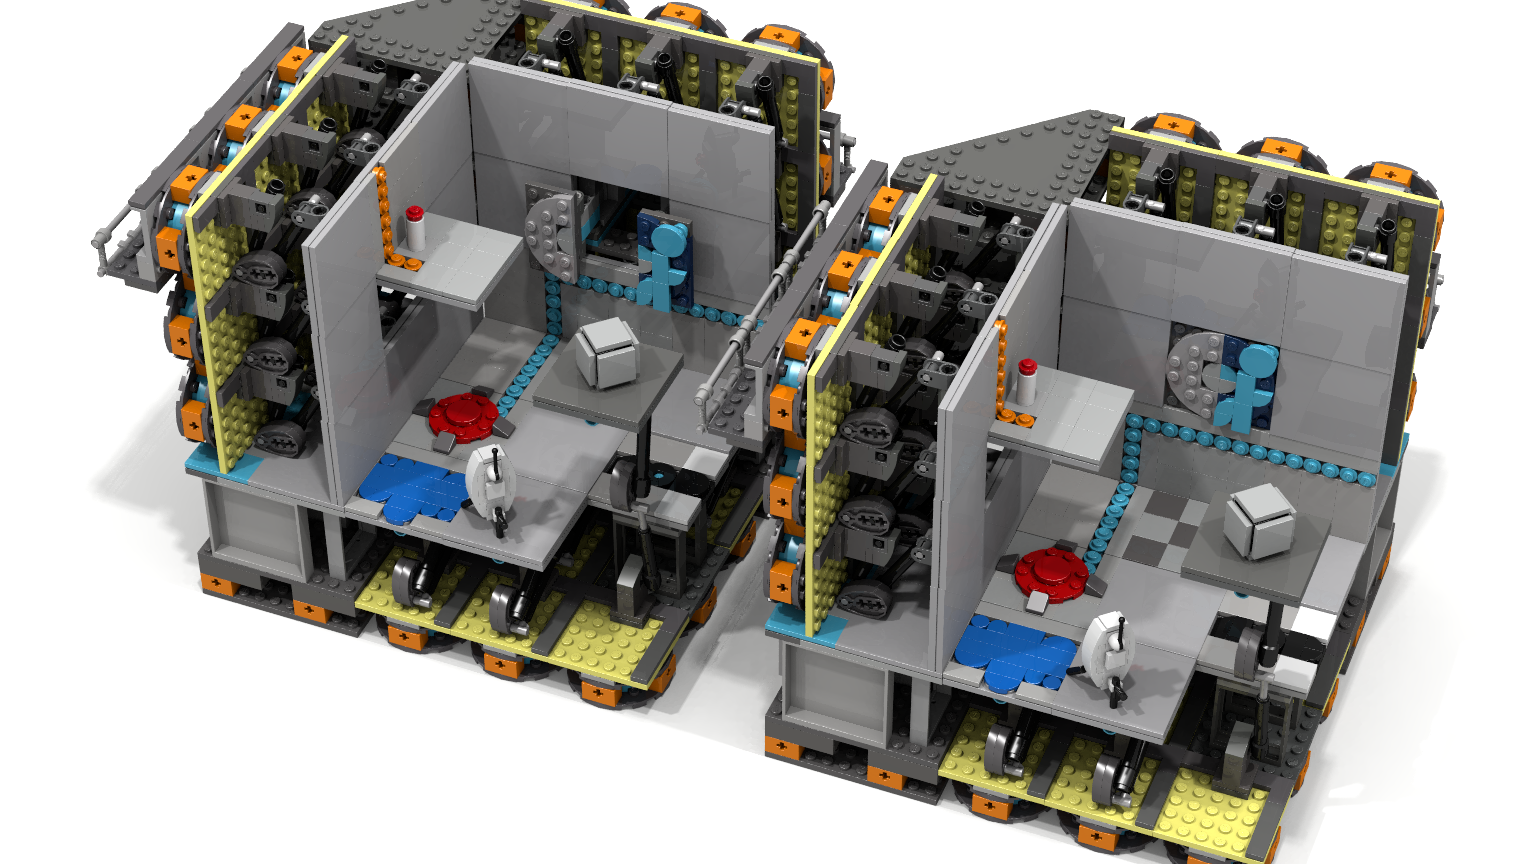
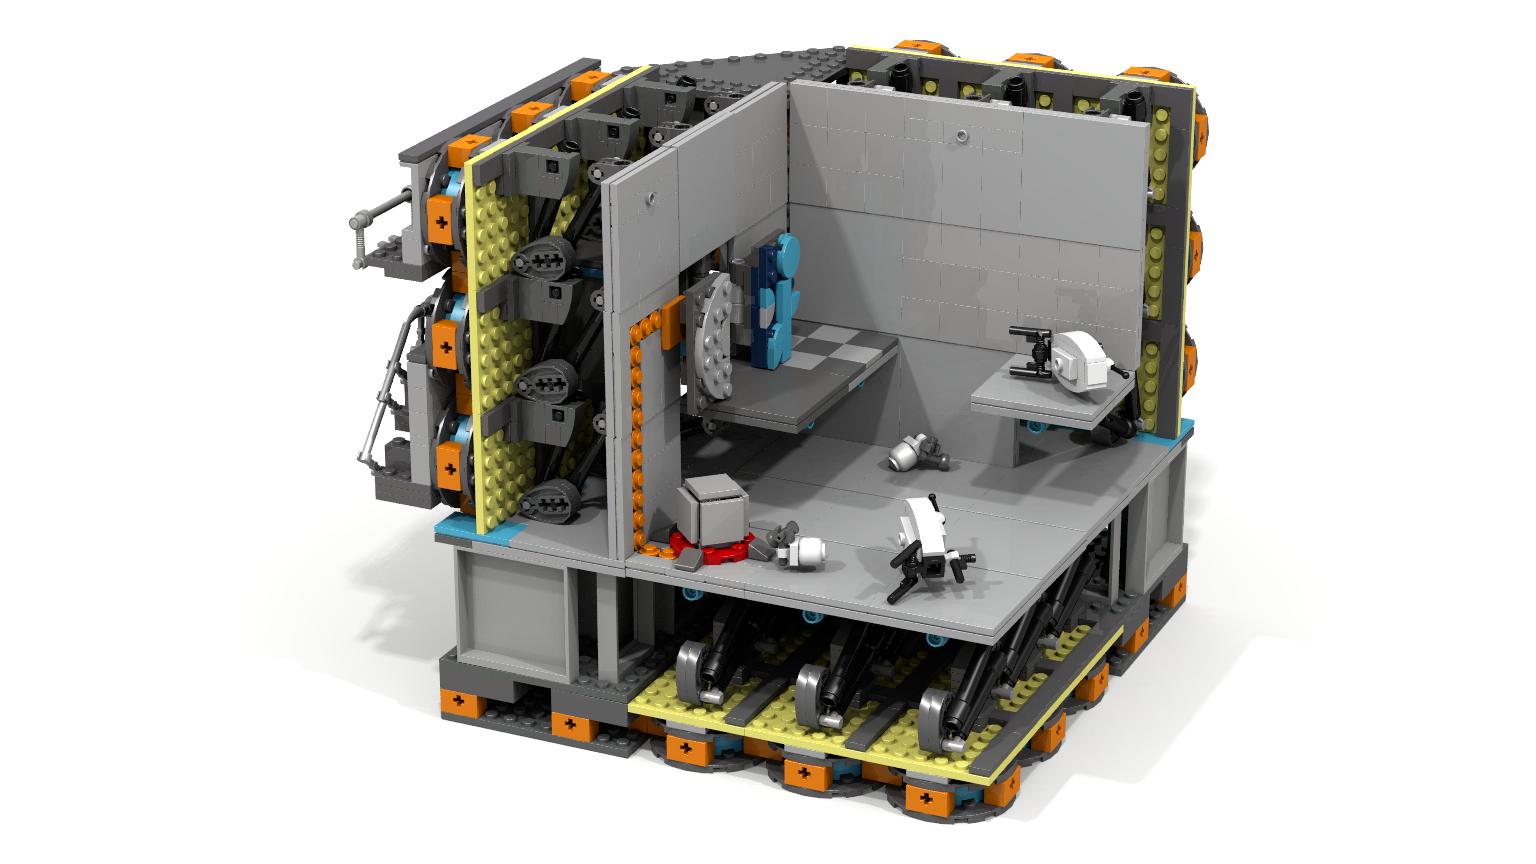
The Observation Room is the size of a single modular unit. However, it does not need a modular unit to attach; it is a separate assembly.
The Observation Room front is flush with the panel wall, and can fit minifigures standing inside of it. The interior details are bare at the moment, with a few computer screens on the walls.
To enter the observation room, the behind-the-scenes Walkways are used.

Walkways
The in-game walkways had two horizontal bars running along their length, and I started with this, but then tried having a single bar to save pieces.
I also added a staircase portion, so that minifigures can climb to different heights behind the scenes. For example, a test subject can go from a Chamberlock to the Observation Room to see their evaluation.
I ensured the walkways don't interfere with existing functional elements (Crusher & Chamberlock), by including gaps in their design. I'm not terribly happy with these designs yet, but it's the best so far!


Other Changes:
- Rendering with the correct light gray color now!
- Turret Leg attachment improvement (thanks to user "moreorlessers" for pointing out the obvious oversight)
- I started designing a new version of the Cube Dropper! Similar to the Observation Room, it is a separate module. You slide the cube in from the rear, and it drops out the tube. Unlike the game, this dropper hangs from the wall, but I think this is more playable than adding a ceiling. It can always be raised one level above the walls to drop from even higher!


Summary
Please let me know what you think of the designs so far! Any feedback is good, specifically: what you think of the walkway guiderail, how to improve the dropper's vertical black bars, and how the Observation Room looks from inside the test chamber.
I'm not quite committed to adding these yet, but I do want to get them as good as possible before rejecting them for good! Don't worry about parts counts *too* much, I want to get the look and style before making them practical, like the other elements in this set!
Thank you so much for your feedback, and a super big thanks to those of you that have shared this project! Every time someone share it, the project gets a noticeable jump in supporters, and I really appreciate all your help! :)
Flying Gracefully Like An Eagle (You and the Vote Count!)
Hey everyone,
It's been a while, but finally the first tutorial is up! It's for the Aerial Faith Plate, found here: Aerial Faith Plate Tutorial
We've had a huge spike in support recently, which is fantastic! Thank you so much to everyone who has supported recently, it makes me so happy this project is still alive.
There's more content on the way, including potential modifications to the set. As always, keep sharing and telling your friends about the Lego Portal project! Every free vote helps :D
New Look & Over 2000!
Hello everyone!
This project just received a new look, including updated renders and a better formatted description. Hopefully this helps continue gathering support.
Speaking of which: thank you so much to the over 2000 of you who have supported this project so far! We’re over 20% of the way there! I never hoped I would get to say that, I’m so happy that this project has come as far as it has!
I’ve been slow updating the model, as I had a bit of a rough first quarter, but now finals are over and next quarter is better planned, I’ll be more regularly updating the content and describing new features (for example, the door and faith plate parts counts have been reduced but I just included this in the description).
As I keep developing new elements, I realize more and more how valuable modularity is. I hadn’t thought of adding gels or the overgrown look when first conceptualizing this set, but thanks to modularity I’ve been able to! As several supporters have put it, this set is a reflection of the Lego spirit, the ideals of creative and modular building.
Thank you for your support and for sharing it with friends as much as you have up to this point, hopefully we keep growing to that 10,000! :D
Covering Gaps
This is rendered to show how well panels can be tilted to cover gaps. The answer is somewhat well. I’m investigating ways to cover the exposed parts of the panel, not sure how just yet.


New Dimensions of Testing
I quickly rendered up what it would look like to have each section of wall at a different depth, to achieve a diagonal test chamber.
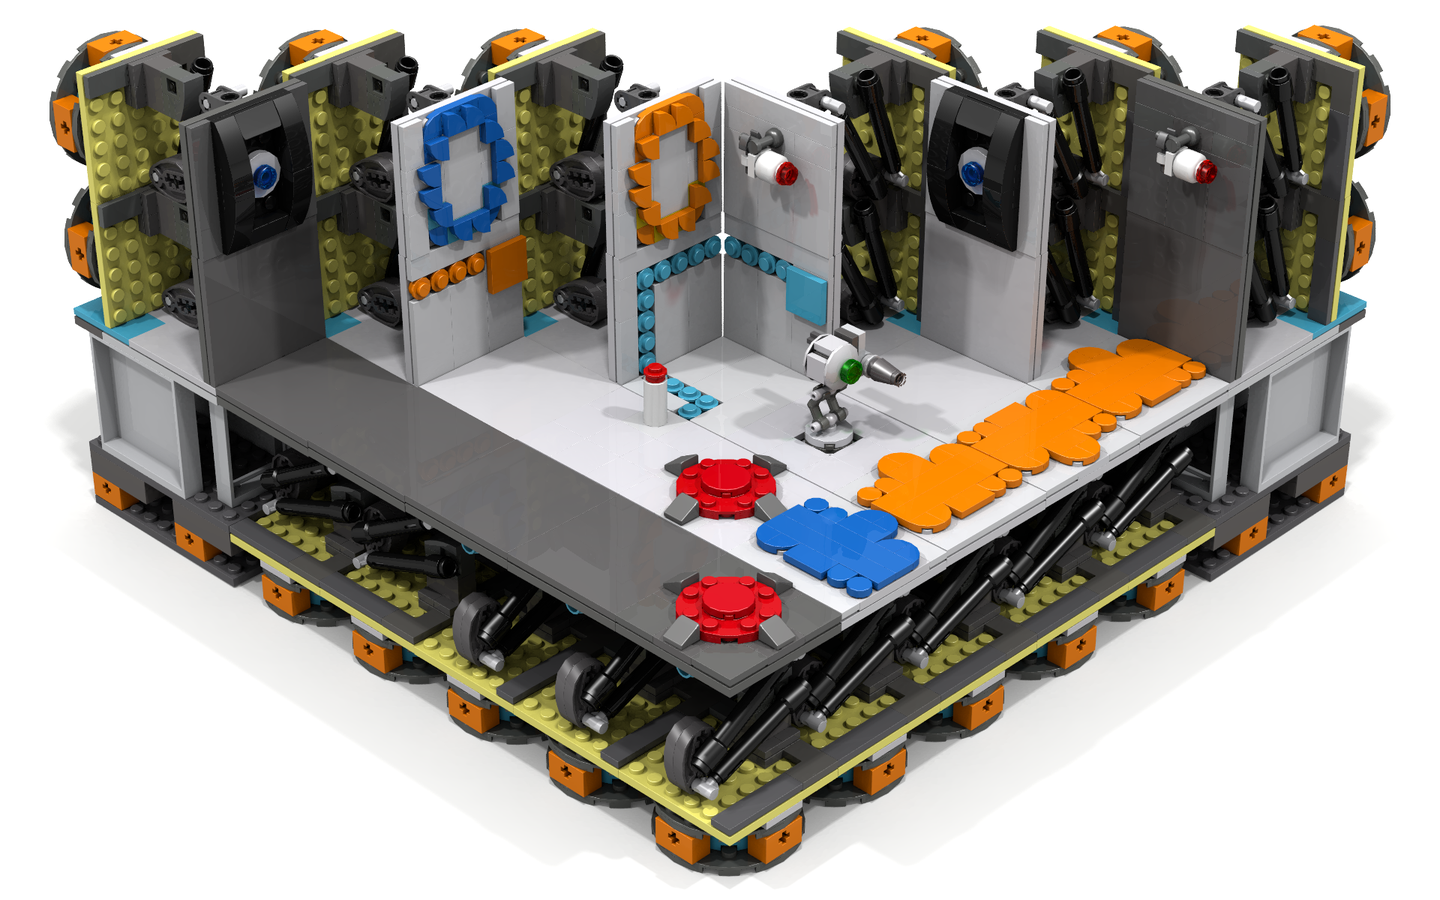
Note that this uses all of the included 27 panels, and leaves the builder with three more modular bases that can hold a chamberlock, aerial faith plate, crusher, or Wheatley rail.
The surfaces shown are some of the ones that will be included with the set (except maybe the goo, I’m totally sure yet). I tried to show that with surface pieces, the background color can be either light or dark gray (either portalable or non-portalable).
There's meant to be horizontal wall connectors as well, they aren't shown here.
More interesting tests on the way! :D
Depth!
I thought of a way to further increase modularity in the set, and when testing it even reduced the parts count by 12 parts!
The way to do it is shift the axle holes on the vertical wall elements to be in line with the modular unit system (6 studs round), and doing this means the wall can have panels at different depths.


Here’s an example chamber using these pushed back panels, along with the overgrown aesthetic.

Overgrown Aperture Concept
Here is a concept for how the test chamber could be made to look overgrown, like at the start of the game, with minimal added parts. I rendered a wall on its own at first, and then a regular 3 by 3 chamber to put it in context.


I experimented with a variety of techniques to make it look overgrown: There’s a panel coming loose, a panel completely missing it’s head, , two panels with metal understructure showing, two panels with only rusted metal grating remaining on their surface, a panel with a cracked surface accomplished with jumper plates, ivy and leaves growing on the walls and floor, debris on the floor, and a turret with one shell having fallen. These are just some ideas for making it look overgrown, and thankfully most involve removing parts from built models, meaning the only additions are leaves, ivy, clips and rusted metal. I think to look good it should have even more foliage than it does now, what do you guys think?
Frankenturrets
This is my design for a Frankenturret! They live inside the Aperture Science Weighted Storage Cubes, so I scaled them to the cubes in the testing chamber. There are two variants, with a tooth piece on the head and without. I quite like this scale, what do you all think?


Not Approved
Leave Private Feedback
This will only be visible to the creator.