
Audi Sport quattro "Pikes Peak" 1987 Speed Champions
Expired
Mission "LEGO-S1" accomplished?
Hey folks, this is my GOODBYE!
My own construction (MOC) of the 1987 Audi Sport quattro S1 "Pikes Peak" certainly has NOT gained 10.000 supporters, so there will be no examination process whether a real LEGO set of it would be feasable.
BUT Lego has its own Sportquattro now, the nice 76897 set of the 1985 Audi Sport quattro S1 "Rallye San Remo" - and the new Speed Champions are bigger with the now 8stud width - so no similarities to my little white runner.
Meanwhile I have expanded my "range" and have now build ALL of the Audi Quattro and Audi Sport quattro of the fabulous 1980s - and have uploaded them all at bricklink, where everybody can see the nice 3D rotatable "building steps" with the parts numbers, see here my page at BEICKLINK: https://www.bricklink.com/v3/studio/public_gallery.page?idUser=1217495
Maybe you try out some for yourselves?
Here a photo of my own private "quattro meeting":
Lego's current 76897 set of the 1985 S1, but with some more stickers, with my own 6stud version of the car, built in April 2019.
Best greetings to you all!
Thomas
The final update? Front skirt improved!
Last time I showed you -between other things- the wider front grille, combined with a (then necessary) different front skirt, with a triangular 35787 tile - see below the last update.
Now I made that side part of the front skirt a little bigger, like it is at my San Remo S1 (see below, too): It's now made of two tiles and shows the "Audi Sport" banner as well as the rallyestripes in red and grey to accompany the black below. See here:
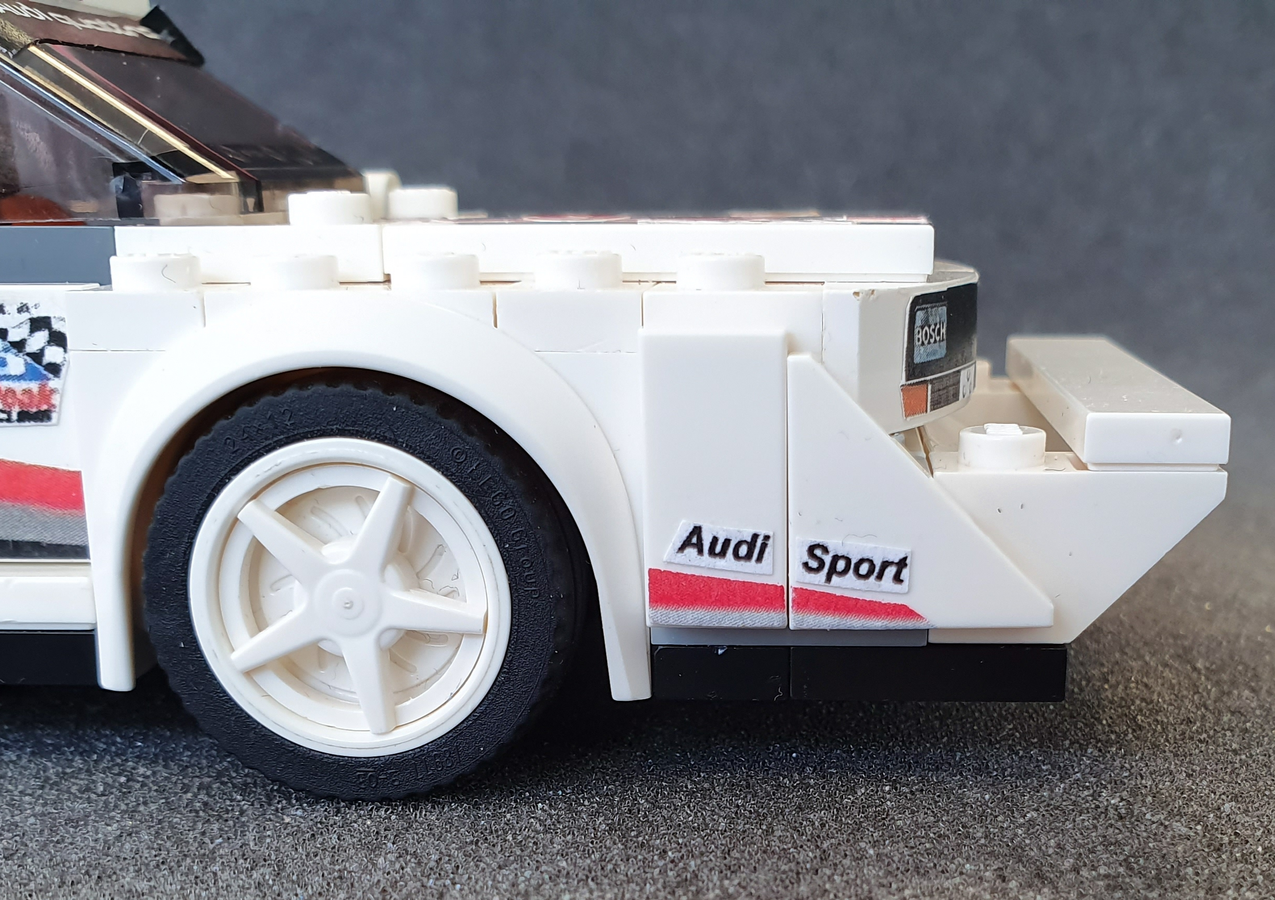
Yes, it is again not "LEGO legal", because both tiles sit on just one stud.
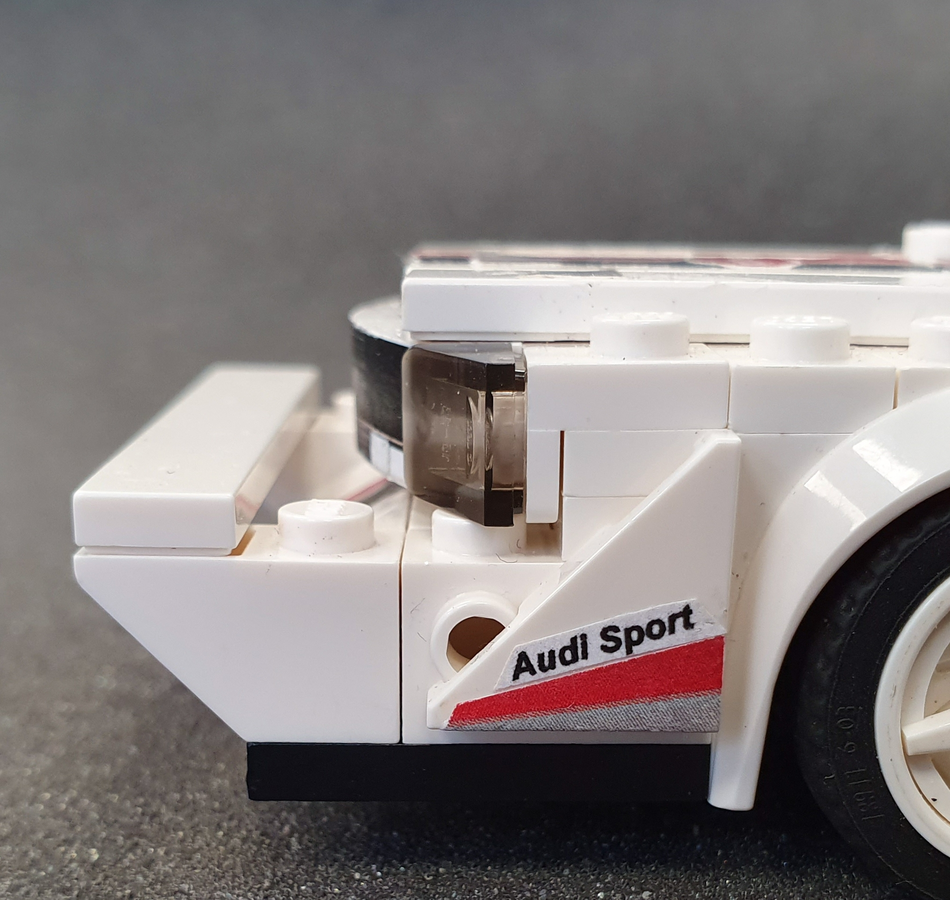
Therefore, I thought up yet another "side of the front skirt"-version, with only one triangular 35787 tile, but on two studs, again with rallye stripes and a smaller "Audi Sport", see here:
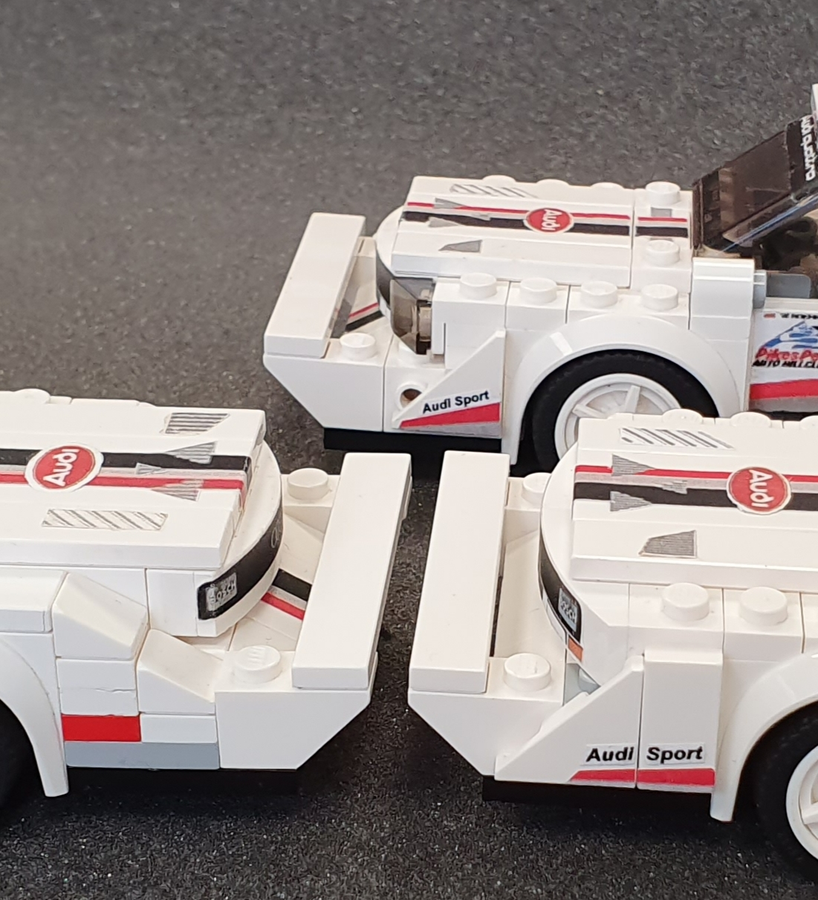
Here a combined view of three front skirts (sides), from the project version on:
As you may have noticed, I added two transparent black 1x1 slopes as front lights.
While the wide 1x6 sticker with front grille and front lights looks very authentic, it is not my goal to achieve as much as possible by stickers, but rather as little as possible - which his truly difficult with this model, whose original car is littered with stickers. But I'm a builder, not a "gluer", so I'm happy to replace the headlights with stickers, even as some authenticity is lost.
That's it, right now I can't think of anything else to improve.
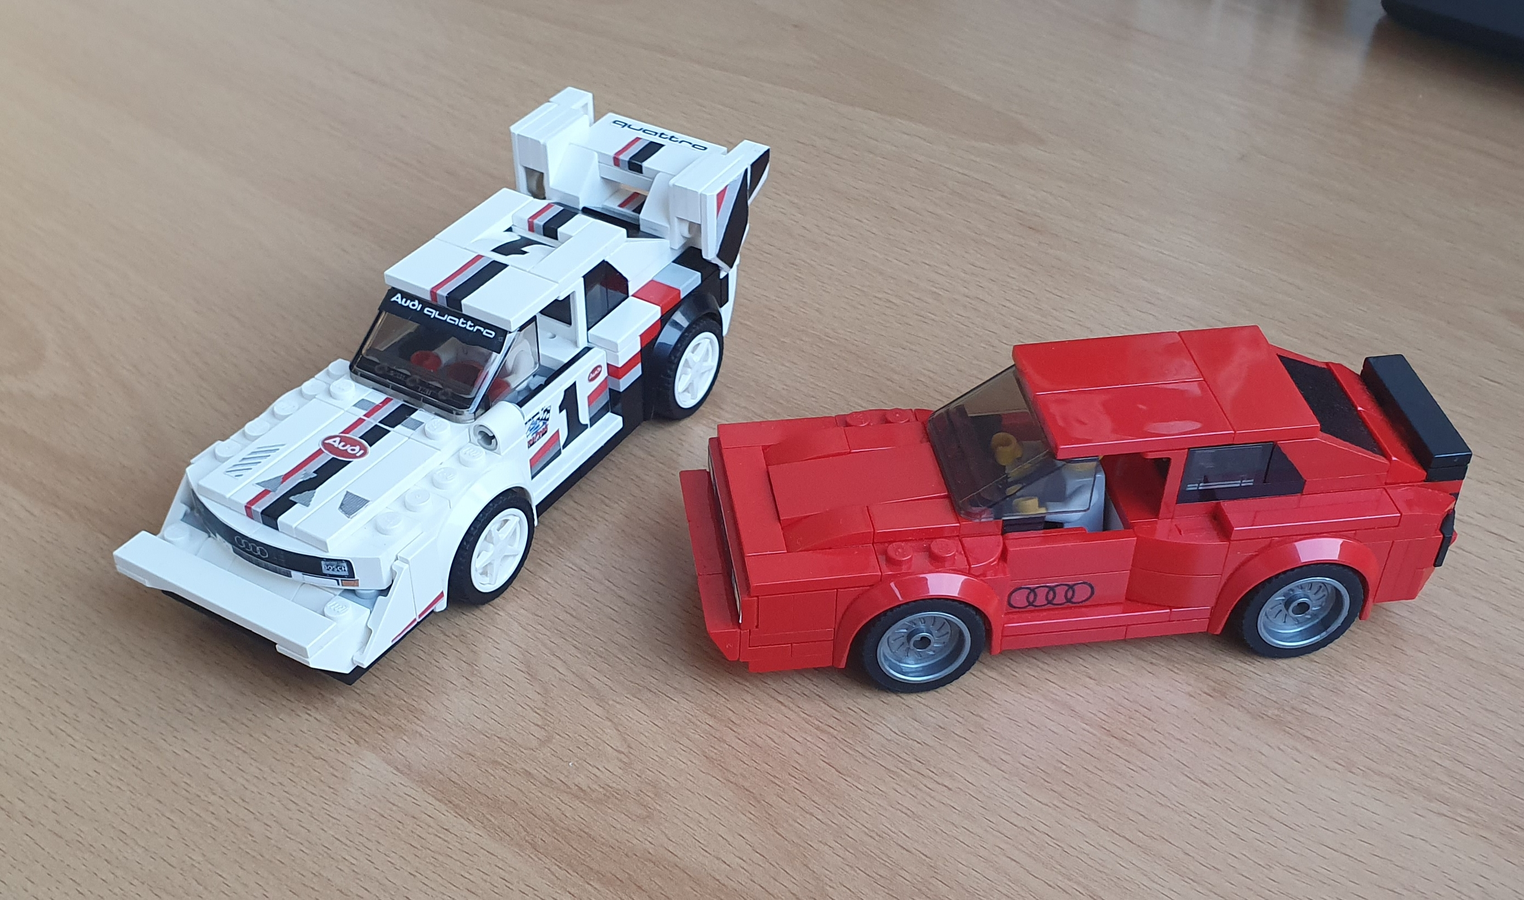
As a BONUS - here a photo of the Pikes Peak S1 together with the Audi Quattro, the "Urquattro", with which it all began in 1980.
And the 1984 "Rallye Monte Carlo" version of the Quattro - Walter Röhrl/Chr. Geistdörfer won their 4th "Monte" with the original car! It is not its final version, I have to improve the rear:
Here again the link to my BRICKLINK page, where all my creations are online, with parts lists, 3D-rotatable "building steps" and the possibility to order directly from there - at several bricklink pages:
https://www.bricklink.com/v3/studio/public_gallery.page?idUser=1217495
As always, my best greetings out to you all!
Thomas
Stability and two options!
Here all my Audi Sport quattro models. The work on them helped me to improve the Pikes Peak S1 as well. You see here from right to left:
The red 1984 series,
the 1985 S1 Rallye Portugal (Röhrl/Geistdörfer 3rd place),
the 1985 S1 E2 Rallye San Remo (Röhrl/Geistdörfer 1st place!) and of course
the 1987 S1 "Pikes Peak" winner car (Röhrl solo drive)

Yes, again I tried to improve the Pikes Peak S1 model.
Stability!
Below the car: I exchanged the former 1x4 plates (3710) which were part of the basis which the nice 64799 4x4 plate with cutout. Thus the whole car is more robust. See here the comparison between the newest (left) and a former car (I removed the 2x12 plate and the wheel sections):

First option: Shorter wheelbase!
I shortened the wheel base, so the rear axle moved 1 brick to the middle, which is more authentic to the original car. The overhang at the back is thus bigger, see here:

Downside: The colour gradient of red-grey-black doesn't run so smoothly anymore, see here:
Old

New

So, like I said, just an option - a construction possibility.
Second option: Wider front grille!
As I wrote before, and some pointed out, the front grill and the whole bonnet with their 4 bricks weren't wide enough to look authentic. But how else to make the distinctive slopes at the sides that reach to the front spoiler?
Well, my work on the 1985 San Remo S1 E2 (see above) showed me a way: Using the triangular 35787 tiles for the slopes, thus enabling between them a wider grille. See here:

Downside: The 35787 are connected to just one stud - which is stabilitywise "not legal" in the LEGO world, see here:


INFO: With the San Remo I used a 1x2 brick with two studs on the side (but put TWO tiles on them). It would be possible to use just ONE diagonal tile on such a modified 1x2 brick with two side studs.
See here my "San Remo Solution" (not "LEGO legal" because both tiles cling to just one stud each):

This for now,
best wishes from Germany!
Thomas
ASQ brothers! The S1 and "the normal one"

Hello and thank you more than a thousand times for the support - last week the important step of 1.000 supporters was reached!
The project will at least go on until about the end of April 2020, hey!
(The fact that AbFab1974's really nice Peugeot 205 turbo was not approved a few weeks ago left me with doubts if LEGO IDEAS is the right platform for Speed Champion-sized cars at all.
It may have been the big landscape which wouldn't have made it into a Speed Champions set or it may have been the "livery" (rallye colours) of the car in yet impossible places - but that could have been dealt with, couldn't it? I respect if LEGO likes to realise rather the creative, never-seen-before building ideas (like the wonderful pop-up book) - but now there's the "Not Approved"-elephant in the room where the Peugeot may never get around, while it would have been a good -and successful- Speed Champion, don't forget his quick gathering of the 10.000 supporters!
Compared to him my S1 gathers rather slowly and with this speed will not make it to 5.000 until April 2020. But maybe that's good, because there won't be a IDEAS-based review and thus no "NO!" in the room if maybe Audi themselves really want it and LEGO likes it, too. Well, just my current ideas.)
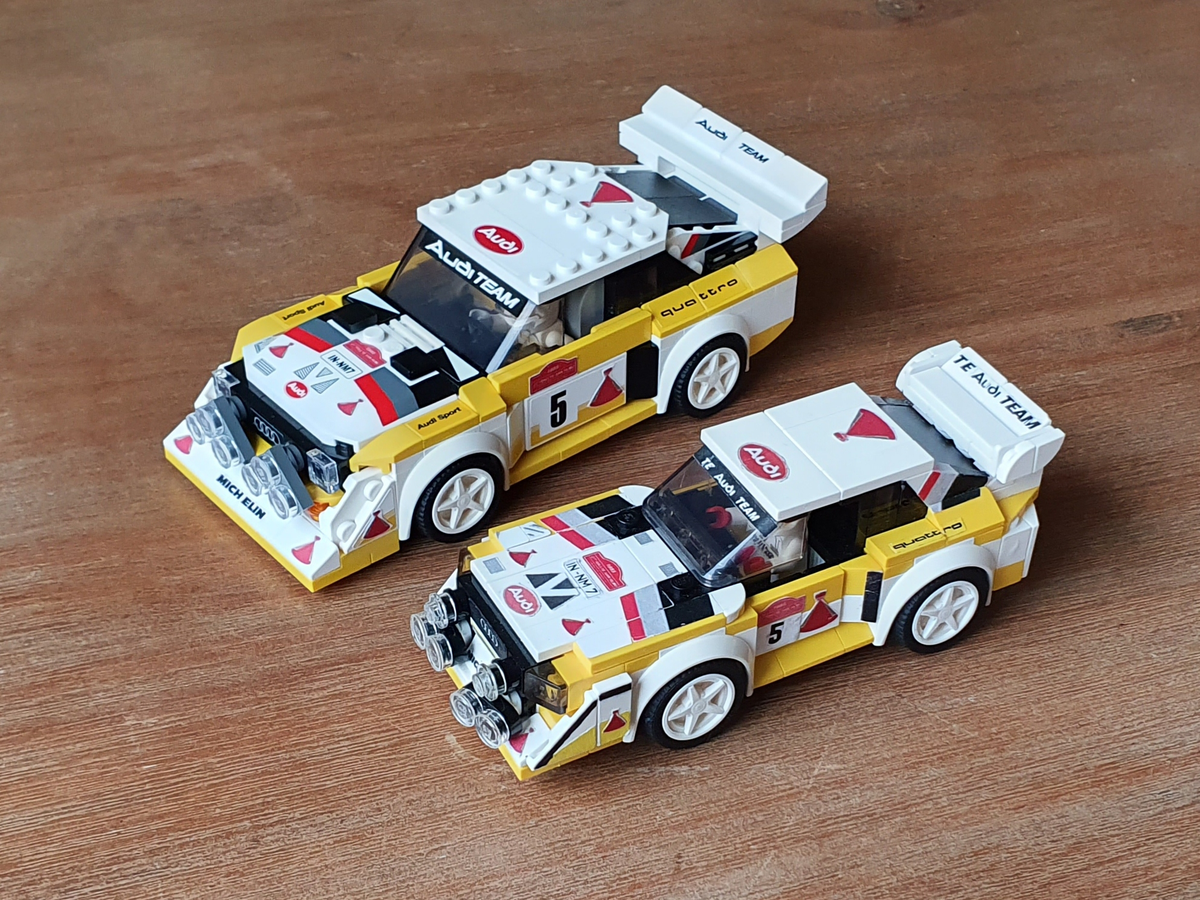
However: To celebrate the 1.000- threshold, I built the "factory version" of the Audi Sport quattro!
It's in red, with white wheels, just as in 1984. I hope you like it! See here the brothers together:

I will NOT make a seperate LEGO IDEAS project of the red Sport quattro - instead I offer it as an option for this project: A possible extension into a double set, not an obligatory part - the Pikes Peak S1 will stay the only obligatory "core" of this project.
I soon will add here some detailed photos of the "red ASQ", as I call him. Until then, some more from the family reunion. Have fun!
Thomas


Completing the set: Motor detail and authentic driver's 1987 race overall!
Hello S1 friends,
for some time I thought couldn't do anything to improve the car - but wrong:
- Authentic driver's 1987 race overall
The "R8"-themed overall of the driver I obviously took from the "R8 LMS"-Speed Champions set 75873.
That should be remedied - and so I did: I created a sticker for the minifig torso to imitate Walter Röhrl's overall from the 1987 Pikes Peak Hill Climb. See here (already in "lived in" condition):

To see the original race overall Mr. Röhrl wore in 1987's Pikes Peak race, see the photo gallery at this page (in German) - it's an article of "auto, motor, sport", a real good German car magazine:
https://www.auto-motor-und-sport.de/motorsport/pikes-peak-flossen-hoch-1/
(It's the 4th photo there. I won't show it here because to avoid copyright infringements...)
- Motor detail with 5cylinder motor!
My S1-model's original "motor" consisted of a grey 2x4 brick - so there was nothing resembling a real motor. That could be improved, too.
The 2x4 brick together with the white 1x2 brick can be replaced with this new motor/engine detail, which even contains 5 round plates reminiscing of the famous 5-cylinder motor of the Sport quattros:


Time to get the hands dirty...

But here a warning: Removing the 2x4 block reduces the car's structural stability a bit!
So - if you really want to play with it instead of just putting it on the shelf, you should reduce the motor detail to a 2x2 space, leaving the 5 "cylinders" intact, but putting a 2x2 block (or two parallel 1x2 bricks) in front of the steering wheel.
Additional information:
Initially, I changed the head and used an old one from the 80s (see below), but I changed it back.

Best greetings!
Tom
Digital version plus parts list and instruction!
Hello!
I finally did a digital version of the LEGO-S1, using bricklink's "Stud.io".
There are two different options (each contains a parts list and a building instruction):
1. The original construction I built/build for myself - mostly in white and ready for stickers.
https://studio.bricklink.com/v2/build/model.page?idModel=69725

2. A version with coloured tiles - instead of room for stickers:
https://studio.bricklink.com/v2/build/model.page?idModel=69576

So, none of those realistic looking stickers - why?
- They were/are custom-made by me and can't be ordered from LEGO anyway.
(Nevertheless, I could have tried them digitally, maybe with "mecabricks" - I know. I'll try that later, probably.)
- They contain registered trademarks (Audi, quattro), so I won't have them ready for download, either.
Therefore everyone who really, really wants the authentic looking stickers has to try for him/herself.
It's not impossible, I did it too! Take a good look at the photos incl. the updates and have a try. I myself did only the red-grey-black stripes and the little mesh parts on the bonnet/hoof myself and took the other parts from images of the original I found in the Internet (then saved, cut out the part, measured it to brick size, printed in paper, cut out, glued on).
UPDATE: The detailed photos will be NOT be in my Facebook page "ASqS1PP-1987", but soon at bricklink - in the MOC-collection "wto", where you can see the white tile separately which need to bear the stickers. Here the link: https://studio.bricklink.com/v2/build/model.page?idModel=69717
To achieve this:

Have fun!
Thomas
The ... very last enhancement: New rims, rear skirt, rear spoiler - model VERSION 12!
I can’t keep from rethinking the model – good or bad?
Here some new photos:


Here the details:
1. Five-spoke rims on the wheels

I had refrained from that early on, because the rims of original “Pikes Peak S1” lie more deeply in the wheel, not at level with the tires, as there are here. Well, I made up my mind and consider the look of the five spokes more important than their position on/in the wheel. Do you like it?
2. New rear skirt
The rear skirt has changed. That was mainly for the sake of stability.
See here:

The whole rear skirt now is made of three white 2x2 slopes sitting on a black 1x6 plate – making up only 4 pieces instead of 7 (before). See here:

Downside: While the former rear skirt had two real grilles (as you can see above), there is now only a long sticker in the middle - ar least that is taken from photos of the original S1.
As I wrote, I did this to improve the stability of the rear itself and its attachment to the car. It's for the better, really.
3. A new rear spoiler!
As you also could see above, I altered the rear spoiler again:

- The former one had 27 pieces to it, the new one has 20.
- I wanted to make it even less bulky, so there is now more room (2 plates breadth) between the outward “shields” and the upright 2x2 brackets that are the main basis. See here a synopsis of the last stages (without project version 10):

- Good: There is now a wider tile enabling a bigger “quattro” logo on the top of the rear spoiler.
- The rear spoiler looks more dynamic/fluent now. The former did show a clear, wide edge looking to the front, yes - but it looked still a little like a wall.
- I built the two diagonal slopes going up the spoiler from front to back to reminisce the supporting structure from the 1987 original, see here:

- Looking from behind, there are now two spikes coming down, representing a supporting structure. The other parts from the last version I liked very much, but could not use here with the new structure.

Presented by "Little Walter"!

I very much much hope you like the newest version of the car as much as I do. I sincerely think it can reach 10.000 supporters and will then make another great 'LEGO Speed Champion".
Best wishes for you!
Thomas


The last enhancement - and comparison to the original
Hello,
one last thing I have improved on the car: The wider air vent (plus sponsor stickers) on the rear skirt. See here:

Oh, look - where has the photo been taken?
Courtesy of "Audi Tradition" in Ingolstadt, I was very happy to take photos of the original together with my model (or vice versa). That's some kind of comparison!


Best regards and wishes,
Tom
Enhanced Version 11 (11b?) - rear spoiler less bulky!
Hello friends,
one of the first supporters recently said he liked the old rear spoiler better.
Thank you M. B. - supporter No 3 after myself and the person at LEGO who gave the OK to the project!
I have tried to at least make the new spoiler a little less bulky:
As you may see in the pictures below I took away a little 1x1 plate right next to the outer shape and at the top end I added the funny "slopes with stud notch" to give it vertical lines and took away the 1x2 diagonal whats-it-called between.
And the red-grey-black lines on the bonnet run now under the brown "Audiplum"
and "little Walter" (you know who) finally has hairs!


Additionally, I added a photo of the now three cars I have built - to make everybody see: Yes, it's not a singular model on a shelf, there are more of it - and everybody could own one (and rightly should, don't you think?)

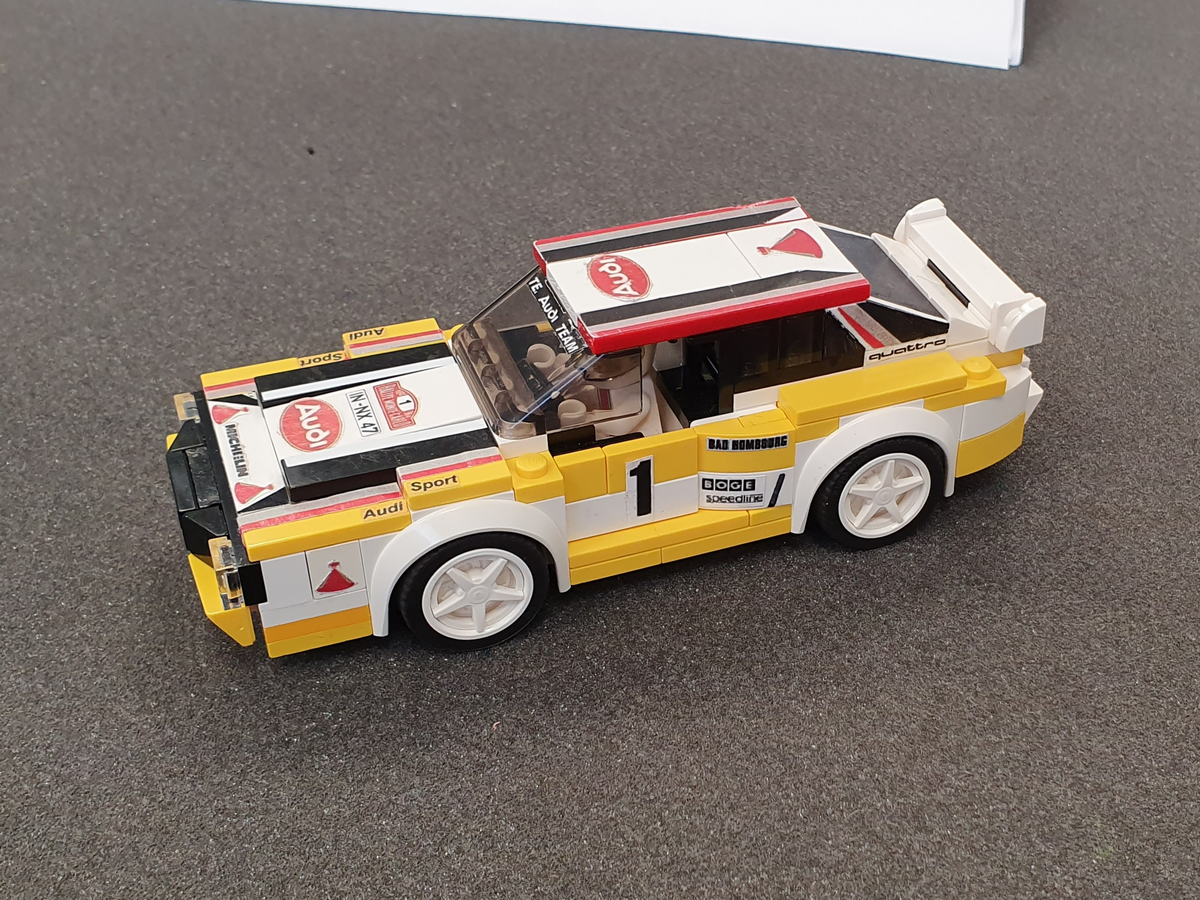
As always, here some outside photos - the real deal! It was wet, looks like tarmac now - nice!


Version 11 - new rear spoiler, side skirts
Hello LEGO fans
and especially thank you so very much, dear friends / supporters of my S1-project for giving me more time since reaching the mark of 100 supports (312 now as I write this)!
Here you can see the changes I made regarding the rear spoiler. It was a real difficult decision but in the end it has more stability now, recalls the difficult shape of the original better and reaches down to the sides just like the original spoiler.
I built a second model of the Pikes Peak-S1 to better show you the differences. Look (the new one on the left side):


As you can see here above on the left side, I also changed the side skirts from "black over white" to "white over black".
Here from above:

Here the weak spot: It took two bricks (if you still call it that, those new shapes don't resemble bricks anymore) to try to replicate the difficult five-edged shape of Audi's original rear spoiler. But do it better at this scale!
You may like the old rear spoiler better or just dislike this one - it's a matter of taste you cannot really discuss (although I'd like to).
Here some more details:


Aaand, because you are so nice people, here some "outside action" photographs in the sand - looking as if taken from the Pikes Peak Hill Climb in 1987 (here the last stand of my model version 10 - the original project):


Expired
Leave Private Feedback
This will only be visible to the creator.


