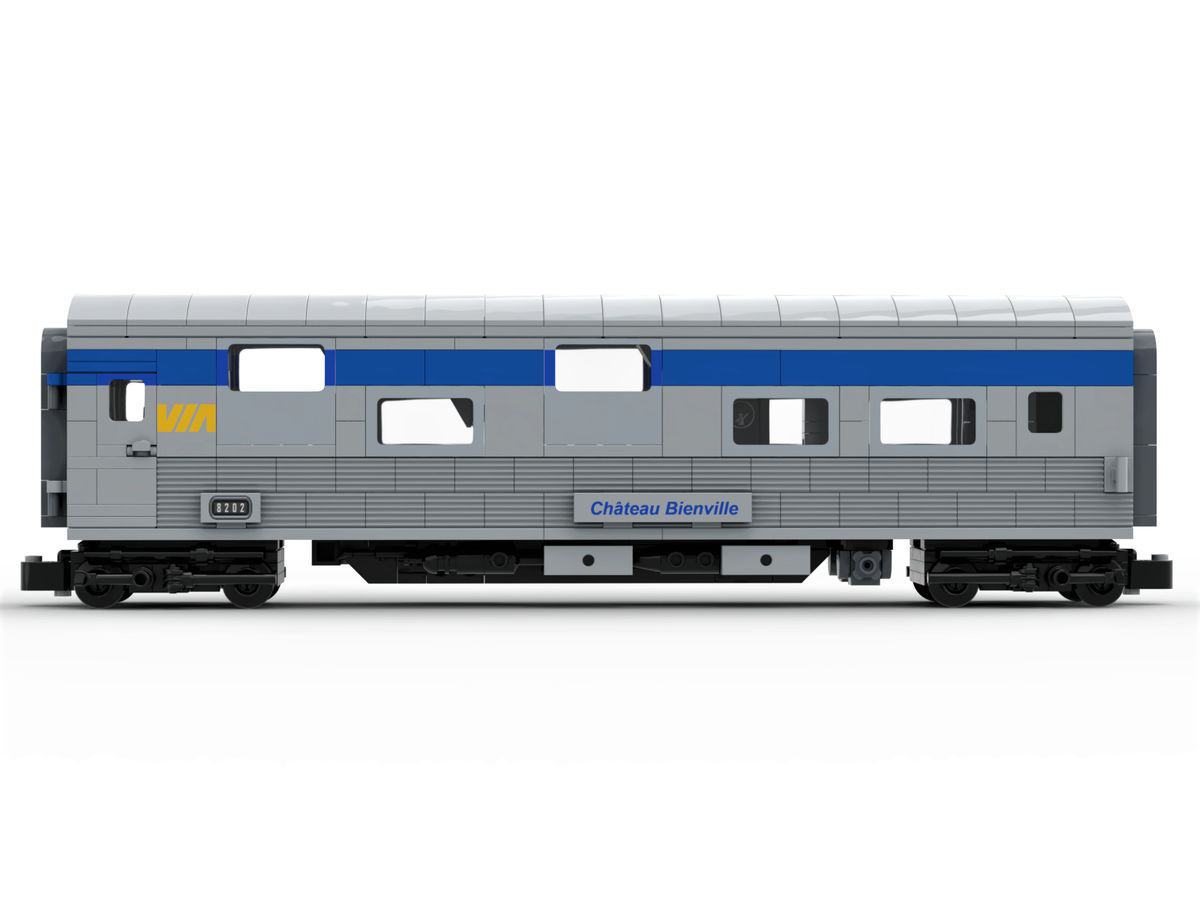
Detailed Tour - Chateau Sleeper Car Part 1
This update will show new pictures of the sleeper car.
Now, I present you to the sleeping car of the train, the “Chateau” Sleeper car. This style of cabin on a sleeper train is called a “duplex roomette”.
As you can see, the windows are at different heights.
The other side of the train is nearly identical. Notice the long water tank underneath the train.
This passenger car has brick-built side doors that can swing open. There is a yellow Via Rail step stool to assist in climbing on and off the train.
Just like the baggage car, the roof can be lifted off.
Here is the interior of the Chateau car, which can accommodate 5 minifigs.
The vestibule area of the car has connecting doors, as well as storage for the yellow step stool and a broom and shovel.
Next we have 3 duplex roomettes. Each roomette has a seat, a luggage rack, a light, and a bed that can be stowed away.
That's all for this update. Tomorrow I will show new pictures of the Skyline dome car.
Detailed Tour - Chateau Sleeper Car Part 2
This update will show new pictures of the sleeper car.
For the upper roomettes, remove the beds from the wall and the seats from the floor.
Then sit the bed on the bracket on the opposite wall.
Now the minifig can lay on the bed!
For the lower duplex roomette, remove the seat and pull out the green bed. Next, attach the bed to the stud on the floor. The minifig’s legs go into an alcove called a “footwell”.
Even though each room is 4 studs long, the beds are 6 studs long. The two cabins partially stack over each other for that extra bit of space.
In the middle of the train is a shower room!
Lastly, we have a sharable area for 2 called a “berth”. In the daytime, it is simply just 2 seats facing each other. There is also a light and there are ventilation fans on each side.
To change the seats into beds, first we lift out the seats and get the bedding out of the closet.
At night time, you can fold down the bed from above and replace the 2 seats with another bed!
Here is a couple sharing the upper and lower berths.

Detailed Tour - Baggage Car
This update will show new pictures of the baggage car in more detail.
The passenger cars are built on long grey plates and have a detailed undercarriage section that also reinforces the model.
Here is the other side of the baggage car. The undercarriage on this side has some tanks and piping.
The undercarriage is also made of some interesting pieces.
Each side of the car has brick-built sliding door that can be opened or closed. Below the door is a grey foothold step to climb into the train car from the ground.
The roof can be lifted to access the interior.
Via Rail not only transports luggage, but also kayaks, sleds, fishing gear, and other cargo for its travelers.
As you can see, every piece of gear has its own holding place.
Here is the cargo area totally emptied.
The baggage car can unload all the cargo for its travelers.
That's all for now! The next update will show new pictures of the Chateau sleeper car.
Detailed Tour - Locomotive
This update will show more pictures of the locomotive.
This dark green, grey, and bright orange livery of the F40PH is known as “Renaissance scheme” from when Via Rail rebuilt all their F40PH locomotives in 2007.
The locomotive has printed pieces with a large grey curve with bright orange stripes.
The other side is nearly identical, except that there isn’t an engine room access ladder.
Here is the rear of the locomotive.
The roof can be lifted off for interior access.
Here is the inside of the engine room. In the center of it all is an EMD 645 16 cylinder diesel engine. To the left of the engine, we have the equipment rack.
As you can see, the equipment rack is full of pipes, tanks, valves, and other complex details.
The engineer is about to enter the engine room through the opening side door.
An engineer minifig can sit in the cab.
That's all for today! The next update will feature more pictures of the baggage car.
Detailed Tour - Overview
Today's update will show off some new pictures of the overview of the whole train set.
The train consists of a F40PH locomotive with 3 passenger cars.
The roof of the locomotive has details such as the horn, radiator fans, air intake vents.
The train’s right side has slightly different details than its left side.
This LEGO train is both authentic model-scale as well as minifig scale.
The locomotive is a bit taller than the passenger cars and features an innovative way to couple the standard LEGO magnetic buffer/coupler piece to a LEGO Technic coupler. A connection is made using the stud that is on the bottom of the LEGO train buffer/coupler piece.
The passenger cars are coupled by using a 1x2 rounded black plate attached to the Technic couplers below.
Also inlcuded with the set is a trackside accesory - a Via Rail sign.


