
Help your fellow builder by leaving your feedback based on these three criteria:
- Originality: How original is this - never seen before?
- Building Techniques: How much skill do you think the creator of this MOC has, in terms of building technique?
- Details: Express how much you like the details of the build.
Your feedback is only shown to the creator as well as yourself. It is not available for other users to see. The creator won't see your user name.
Future TARDIS expansions! (maybe)
Thanks to everyone who's supported so far. I'm currently working on another major build project, but once I'm done with that, I plan on going back and expanding the TARDIS a bit with a few other classic rooms. I'm also going to try an experiment with some custom-printed decals on my current project, which if they work, I'll probably use on the console to create "proper" controls. I may also use them to create some custom chest pieces as well. (Unless Lego surprises us all and decides to release an official set with all 13 Doctors, in which case, I may have to up the ante and create all 35 companion!)
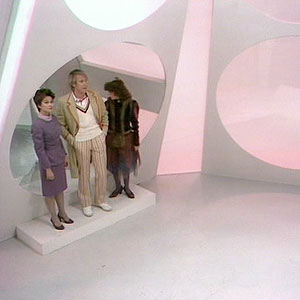
First up, the Cloister Room (because I already have most of the parts) I'd like to build a Zero Room, but it's looking more and more like a no-go at this point because the pink bricks I'd need would be prohibitively expensive.
 I may also try my hands at either Romana or Nyssa's bedroom (Adric/Turlough's would be harder because of the diamond pattern):


And also the TARDIS food machine (an easy build) and boot cupboard (if the decal thing works out, it would just be a printed panel behind a door)

At any rate, watch this space for more updates, after a brief pit-stop in the small town of Perfection, Nevada!

Building a classic Doctor Who console room: STEP 2 -- Building the walls
STEP 2 -- BUILDING THE WALLS:
Most of the wall pieces are identical panels made from 4x10 and 1x10 flat plates covered in white flat tiles and, of course, the flat tan roundels. Take a close look at the image below and you can see that ever other roundel is offset using a pair of two vertical single-prong plates. This was the only way to get a fairly realistic pattern, though I suppose if you wanted to be really accurate, they should be about 3/4th of the size, and 4 1/2 of them per column. I suppose you could accomplish this with a sticker sheet, that that feels like cheating.

Getting these wall pieces to work with the vertical column pieces was the next big chore. As you can sort of see, each panel piece is attached by one of those hinged roof pieces with teeth, which is then heavily reenforced with several large plate pieces, and in turn attached to an "L" brackets to support the stack of 8 column bricks, and a single 2x2 plate for a base. Ideally, this bottom plate would be another "L" bracket with 4 knobs sticking up out of the base, but no such piece exists. This means that the columns are the weakest part of the structure, since they're only attached by a single brick at the top, but I guess if you're really worried, you can use crazy glue.

As you can see, there's a bit of a gap between where the column and the hinge meets, which is good, because it's the only way to get the wall panels to angle correctly. I forgot to mention that the hinges should be set back by about a full brick's height from the top panel piece. This means that the finished wall should meet up about halfway with the vertical column, as you only actually see half-columns on the real set.
I had quite bit of trouble getting the doors to work, and I'm still not 100% happy with them. I originally came up with a design incorporating 2x4 angled trapezoid plates to get the proper angled edges on the outside of the doors. The only problem with this is that there was absolutely no way to do this and still allow the doors to swing inwards. I must have spent a good $50 on various hinge parts trying to experiment and come up with ways of creating something that looked screen accurate and would still open in the proper way, but I eventually gave up and just made them square instead. 
My set is probably more elaborate than it needs to be. I added a recessed scanner, the interior door, and a bit of extra hallway. The scanner could be just as easily accomplished with panels rather than bricks, but this window pane, if it came in white, almost perfectly matches the closed scanner screen from the actual show. I was halfway thinking of building a little mini black-box with glow in the dark stars into that corner just so the Doctor could have something interesting to look at through his scanner window.
Building a classic Doctor Who console room: STEP 1 -- Building the Console
Hi everyone. Here is an attempt to recreate the classic TARDIS console room from the 15th-20th season of the original series. (Essentially, the console room used for second half of the Tom Baker era up until the "chandelier" redesign for the 20th Anniversary.) What you see is my practical creation using readily available parts, though ideally, in a commercially marketable set, we'd have printed panels for the TARDIS console, a sticker "window" for the interior door, and a proper Lego plastic scarf for Tom.
You can actually build this entire set yourself, if you can scrounge up the appropriate parts on eBay or bricklink. Obviously, you'll need a ton of white plate pieces, but the hardest parts to acquire are the tan roundels and white columns. There are 74 of the roundels in my set and 64 of the white column pieces. The interior door was also pretty hard to find. It mostly comes in clear, and was only ever available in four fairly pricy sets.
STEP 1 -- BUILDING THE CONSOLE:
As there are no naturally occurring 6-sided Lego shapes, coming up with a halfway decent looking console (that's still more-or-less in scale) was a nightmare. The base is composed of two layers of three white hinge plates linked to form a chain. When topped with a rocking hinge brick, the chain is just barely big enough to snap around the outer edge of a 7-hole technic wheel hub.
Two of these wheel hub pieces can then be attached together by three connector pins, leaving the center hole free to push a cross-axel piece with end stop up through the base of the central column and into a round coupling and three stacked 2x2 transparent round cylinders. The gap between the inside of the hub and your base plate should be enough to give you a central column that will rise up and down by about one standard brick's height. (Note: This would look better if the cross axel was red, and it was possible to get transparent 2x2 flat round pieces. Since these pieces weren't available, I flipped the central column upside down and used a transparent slide shoe for the top to give it a smooth, but curved, surface) The console does end up being a little tall this way, and it would be better if the bottom wheel axle piece could be removed in some way, allowing it to sit one brick height closer to the ground.
The control panel surfaces themselves are made up of various flat "control" design plates attached to 2x4 angled trapezoid plates. (An official set could use stickers that more closely resembled the actual controls.) The trapezoid plates then need to be tilted at an angle on the rocking hinge bricks to provide the proper "mushroom" shape. There will be some gaps between the console segments, there's no avoiding it without creating brand new specialty pieces. To keep them all a uniformed height, I stick two 1x2 plates under the lip of each console segment, this just barely fits in the gap between the plate and the hinge brick, and leaves very little wiggle room, so your console should end up being be pretty solid.


Help your fellow builder by leaving your feedback based on these three criteria:
- Originality: How original is this - never seen before?
- Building Techniques: How much skill do you think the creator of this MOC has, in terms of building technique?
- Details: Express how much you like the details of the build.
Your feedback is only shown to the creator as well as yourself. It is not available for other users to see. The creator won't see your user name.