
Help your fellow builder by leaving your feedback based on these three criteria:
- Originality: How original is this - never seen before?
- Building Techniques: How much skill do you think the creator of this MOC has, in terms of building technique?
- Details: Express how much you like the details of the build.
Your feedback is only shown to the creator as well as yourself. It is not available for other users to see. The creator won't see your user name.
On
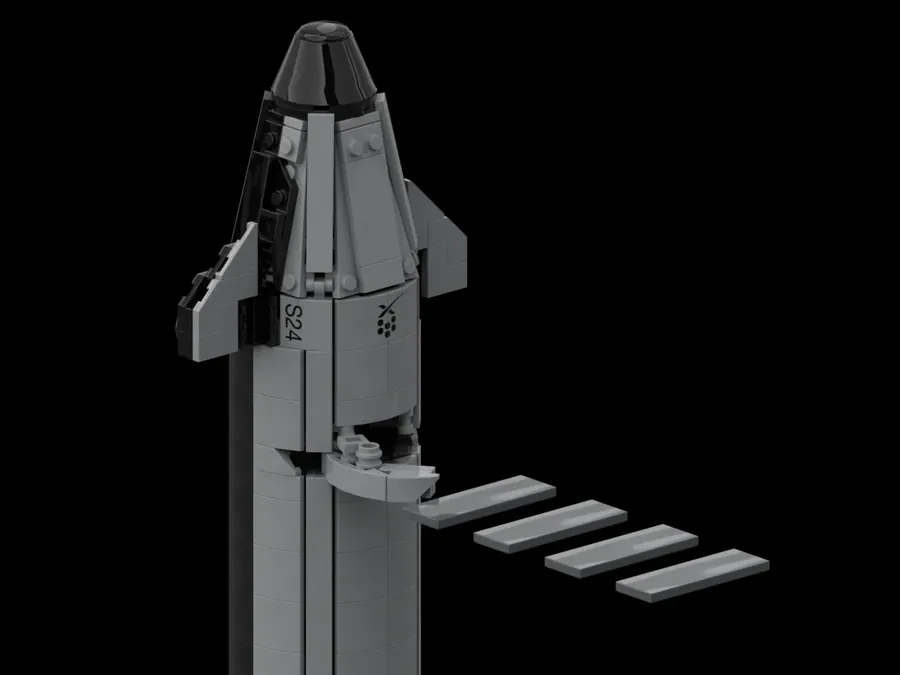
Starlink Dispenser/ Ship 24
Leave it to SpaceX to keep changing things up!
At first, the Starship orbital test flight was intended to fly a near-orbital trajectory, reaching space before crashing/landing in the Pacific Ocean (To avoid harming people or wildlife with potential debris.) Now, the plan has been updated, with Starship prototype 24 set to deploy a batch of SpaceX's Starlink satellites in orbit before it returns to Earth. This update to the LEGO model includes a functional Starlink cargo door (Notably very small, fitting one satellite at a time, and deploying them similarly to a certain candy dispenser that I can't name), and the new SpaceX livery which has been spotted on the vehicle.
As ever, remember to please share this project with anyone you think would be interested. Things are slowing down, but we're still going strong!
On
500 Supporters!
Thank you all! We're going strong!
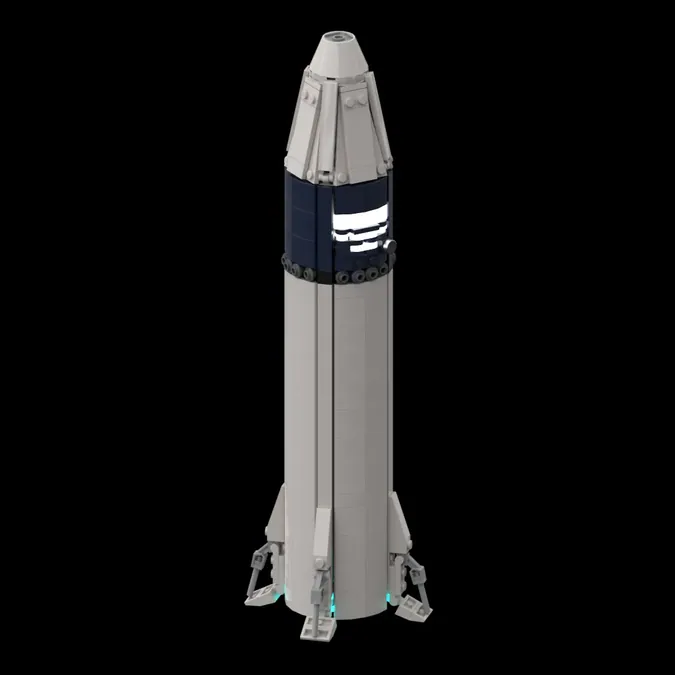
To celebrate, here's a render of the first successful landing of a Starship Prototype, after SN15's successful high-altitude test flight.
As always, make sure to share this project with anyone who might be interested. As someone who has virtually no presence on social media, I would greatly appreciate your help!

On
Mechazilla DRAFT
First things first, I want to clarify that this is a draft. It does not represent the final model. Mechazilla has taken much longer to develop than I anticipated, so my plan is now to release progress updates whenever I make a significant change.
With that out of the way, I give you Mechazilla, the secret to Starship's success! You see, a reusable rocket's effectiveness is limited by the speed of the launch tower and ground systems. Mechazilla aims to reduce the time between rocket launches as much as possible. It consists of an enormous tower with three major arms - two large "chopsticks" and one Quick Disconnect.
The QD arm is located around the interstage between Starship and Superheavy. It serves to load Starship with fuel and other consumables before flight, and holds Superheavy steady while the rocket is being stacked (which happens onsite, as opposed to in a separate structure.) It releases the instant the rocket's engines light during launch, hence the name "Quick Disconnect".
However, arms like that are present with almost all rockets. The interesting part of Mechazilla is the "Chopsticks", the two enormous arms you can see holding Starship just beneath its forward flaps. These arms are capable of travelling vertically through the entire height of the tower, can swing side to side, and can open and close. They serve three purposes. First, they stabilize the rocket against high winds when the QD arm isn't enough. Second, they are capable of picking up Starship and Superheavy off the ground and stacking them on the launch mount, removing the need for a weather-sensitive crane. Finally, and most impressively, they will be used to literally catch Superheavy boosters (and possibly Starships!) as they return to the launch site, removing the need for heavy landing legs, and reducing the time between landing and refueling to almost zero.
It takes about an hour to load Superheavy with fuel. It takes a bit less time to fuel Starship. Thus, after a Starship launch takes place, the following sequence of events means that it will only take about an hour and a half to fly again:
- Liftoff!
- A few minutes later, Superheavy returns to the launch site and is caught.
- A few minutes after that, it is reinstalled on the launch mount, and fueling begins.
- Meanwhile, another Starship has been loaded up with cargo, ready to fly.
- It is picked up by the chopsticks and stacked atop Superheavy.
- The QD arm connects to Starship and begins loading it with fuel.
- 45 minutes to an hour later, the stack is fully fueled and ready to go.
- Repeat.

This was one of the most popular suggestions in the comment section for how to improve this model. Rather than keep you all waiting, I decided to put this out just to show that I was working on the launch tower, even if it's still a "rough draft". So thank you for the suggestions, and if you have any more, let me know! Otherwise, I'll just keep working to improve the tower.
As always, be sure to spread the word about this project. I'm not active at all on social media, so any help would be appreciated! Thank you again, and let's make a Starship LEGO set happen!
On
Superheavy update. Again.
So, I made a small mistake in my previous update. Superheavy no longer has 32 engines - it has 33, which was known at the time of that update. Sorry about that. Anyway, you wouldn't think adding just one engine would be a big deal, would you? Wrong! I had to completely rework the structure of the inner ring of engines, though I thankfully was able to leave the rest of the aft section intact.
Anyway, here's an image of the new design launching a Starship:

On
Revamped Superheavy Aft Section
When I first designed the Superheavy booster for this project, I'll admit I was unsure of how to build the aerocovers, as I wasn't entirely sure on dimensions/appearance, and I was more focused on the engine section which, while it did work, was a bit clunky in appearance. It only got worse when I redesigned the engine section to have 32 raptors (instead of 29). Thus, when a new aerocover layout was spotted at SpaceX's Starbase test facility, I took it as a sign that things needed to change. Looking at the new design, you will see:
- A cleaner-looking engine section, still with 32 engines.
- Two "old-style" aerocovers (These are still on the real booster; they contain electrical equipment.)
- Two "new-style" aerocovers (These are longer and pointier, and contain gas to restart the engines in flight.)
- Two hardpoints in between the grid fins (larger than they should be for "structural reasons")
- A QD (Quick Disconnect) panel - this supplies the booster with fuel, power, etc. while on the launch mount.

Please remember to support and share this design with anyone who would be interested - Lego Starship needs all the help it can get to reach orbit!
Also, in case you missed my little hints...
Coming Soon:

On
HLS Starship
Just for fun, I decided to see what the HLS (Human Landing System) variant of Starship would look like in Lego. This variant will be used in real life to ferry astronauts between NASA's Orion capsule and the surface of the moon during the Artemis program. This variant is painted white to help it deal with heat on the Lunar surface, has solar panels for power, and uses a ring of small thrusters (just under the solar panels) for landing, as the Raptor engines are too powerful. (They would dig an enormous crater in the dust on the Moon's surface.) In addition, the landing legs are beefier, and there are no flaps (as this version isn't designed to return to Earth.)
On
Superheavy 2.0 (+Tanker Starship!)
I have a confession. When SpaceX announced that they were increasing the engine count on Superheavy from 29 to 32, I shoved the information to the back of my mind and ignored it. When observers spotted the thrust structure necessary to support the new engine count at SpaceX's development facility, I pretended I hadn't seen anything. But when Elon Musk himself got on stage, in public, and described 32 engines as the optimal setup for Superheavy, I could postpone the inevitable no longer. A few weeks later, I have now finished my complete overhaul of Superheavy's engine section. It now has the full 32 engines, arranged in a 20-9-3 configuration. In addition, I created a tanker version of Starship, and added a few surface details to both stages, to break up the fairly boring Light Bluish Gray exterior.
Liftoff:

The Engine Section:

Stage Separation:

On
Interior
In my initial post, I asked for feedback on my design. Since then, I've been reading the comments. The first (and only) comment to thus far make a suggestion - by scshute - put forward the idea of an interior for the rocket. I thought about this, and I agree: it would be pretty cool to be able to see inside the rocket. A few days of hard work later, here's the finished product:
Crew Module:
- Bottom floor: living quarters (Those domes represent concepts I saw for small personal living spaces. On the real ship, they would be smaller (and more numerous), but at this scale, this is as small as you can get.
- Middle floor: Cargo storage. You need supplies for a long interplanetary voyage.
- Top floor: Observation/Recreation deck. An open space where the crew can relax and enjoy the view through Starship's massive nosecone window.
- Above top floor: LOX (Liquid Oxygen) header tank (Stores oxidizer exclusively for landing, in nosecone.)

Tank section:
- Above fuel tanks: Crew Hatch (Pop tab lid)
- Top: Main CH4 (Methane) tank
- In between: Common dome (separates tanks) with integrated CH4 Header tank (Stores fuel exclusively for landing.)
- Bottom: Main LOX (Liquid Oxygen) tank
- Through the LOX tank: CH4 downcomer pipe. This pipe brings fuel from the upper tanks down to the engines.

Technically, the tanks should extend further down, but unfortunately that space is necessary for structural reasons.
I didn't include a render of Super Heavy's interior because, as the internal structure is practically the same, it would basically just be a zoomed-out version of Starship's tanks (Minus the CH4 header tank, of course.)
Once again, thank you for the idea, and I would welcome further suggestions in the comment section.
On
100 Supporters & Landing Legs!
100 Supporters already? That was fast!
I just barely finished my first update - landing legs. These legs were inspired by several official SpaceX renders based on the planned DearMoon mission. (You can Google dearmoon renders to see for yourself - I'm not sure if I'm allowed to add the renders here.)

They're hinged and fully retractable - here's a render in extended position:

Help your fellow builder by leaving your feedback based on these three criteria:
- Originality: How original is this - never seen before?
- Building Techniques: How much skill do you think the creator of this MOC has, in terms of building technique?
- Details: Express how much you like the details of the build.
Your feedback is only shown to the creator as well as yourself. It is not available for other users to see. The creator won't see your user name.